Pipe caps are common in Aquaponic and Hydroponics systems, and are used in almost every Practical Sustainability project that involves water. This article will cover our methods for crafting the cheapest practical pipe caps.
Commercial pipe-caps
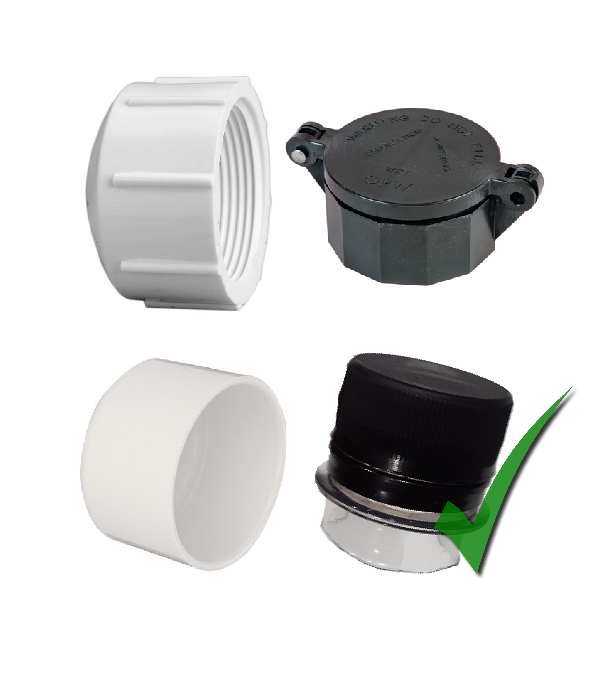
Basically, your commercial cap options are either;
- A simple cheap cap that is glued on – but cannot be removed for cleaning and must match your pipe diameter. Repair / alteration difficult or impossible.
- A removable cap with an internal screw thread, that also needs a corresponding thread on the pipe as well. Increases the costs and difficulty, and must match your pipe diameter. Repair / alteration difficult or impossible.
Both options require you go out and buy specific parts.
Our Solution: Bottle topping your pipes!
What’s a simple plastic item we often throw away that we could use for this purpose? Bottle tops! Priced at around $0.02 for silicone used, this is our best practical solution.

- Takes less than 5 minutes to build.
- Very cheap
- Very easy
- Many bottle sizes exist
- Recycles
- Can withstand reasonably high pressures
- Easy to repair (even though we’ve never had to)
- Long lasting
- Food grade materials only
- Relatively easy to remove if you want to alter your system design.
Do It Yourself!
- Select a bottle with a top screw thread that will fit over your pipe. A tight fit is best, but we have done it successfully with a diameter difference of more than 5mm.
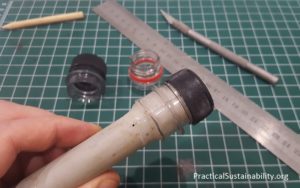
- Cut the top off your bottle with scissors or a knife. You want to leave at least 15-20mm of bottle left to glue to the pipe. A generic coke bottle or other common type has around 25mm(1″) of bottle left over after it is cut.
- ‘Score’ both surfaces to make sure your glue will properly grip the plastic on both the bottle and pipe. Smooth plastic is much harder to glue, so roughen up the surfaces that will be glued. We cut a rough cross hatched pattern with a hobby knife which left nice grooves and ‘flaps’ sticking up, but a rough file or a hacksaw blade will probably work.
- Check the instructions on your glue / silicone. Put glue on the scored pipe end with enough glue to close any gap between pipe and bottle piece. We used fish tank silicone, which is excellent, but most waterproof glues, epoxy or silicone will be fine as long as they can be put on however thick you want. Watery glue such as super glue will not work well. Make sure it is food safe! Comment on this article if you would like us to check certain glues.
- Screw the cap off your bottle top, and slide the threaded piece onto the glued pipe end. Wiggle it around a bit and make sure the glue has no gaps.
- Let it dry for 24 hours if possible. Check the instructions on your glue / silicone.
Done! Your pipe now has a cheap, removable cap.
Comment on this article if you would like us to test these caps against mains pressure, or any other info or ideas you might have or want. The only pipe cap failure we ever had was while clearing a spray bar using a mains pressure hose nozzle, but that cap was not ‘scored’ (step 3).
All comments will be read!
Happy ‘bottle topping’!


1 thought on “‘Bottle top’ your pipes! Sustainable pipe caps.”