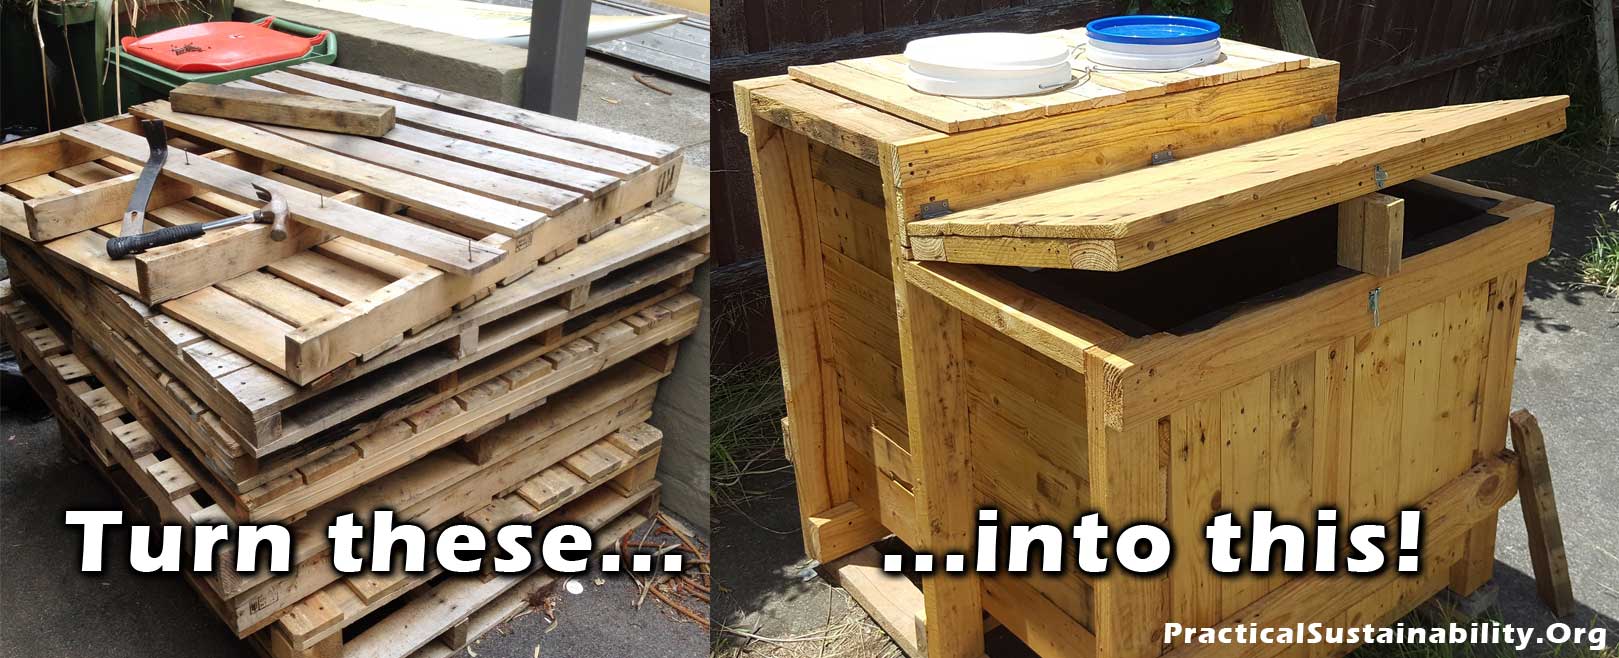
You can often get these for free, look in your local classifieds. For this project we found a nearby self storage business that had an entire room full of timber pallets they were trying to get rid of. If the pallets are old and weak you may break some timber trying to pry it apart. If so, get 7 or 8 pallets.
Two buckets (The bigger the better).
Many kinds of food service businesses will use buckets, and throw them away once they are empty. Ask your locals! Our buckets came from a local Fish & Chip shop – thanks Amanda!
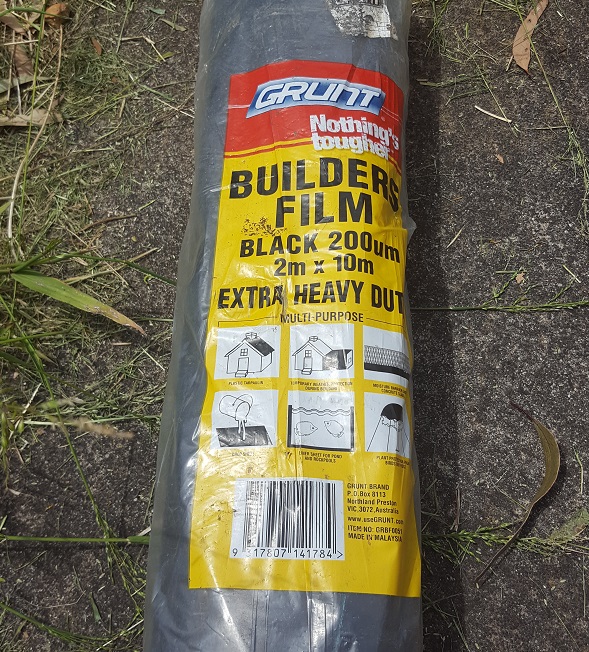
Some Builders Plastic or other plastic sheet. Two 2m x 3m sheets minimum.
This is something we had to buy. It took about half of one of the smallest, cheapest rolls available.
50 screws minimum.
Outdoor timber paint or timber oil.
I used linseed oil on this project. Good, cheap, and reasonably natural.
Tools Required:
Hand saw
Screw gun
Hammer
Stapler (or thumbtacks)
Cheap paintbrush
Time to get started!
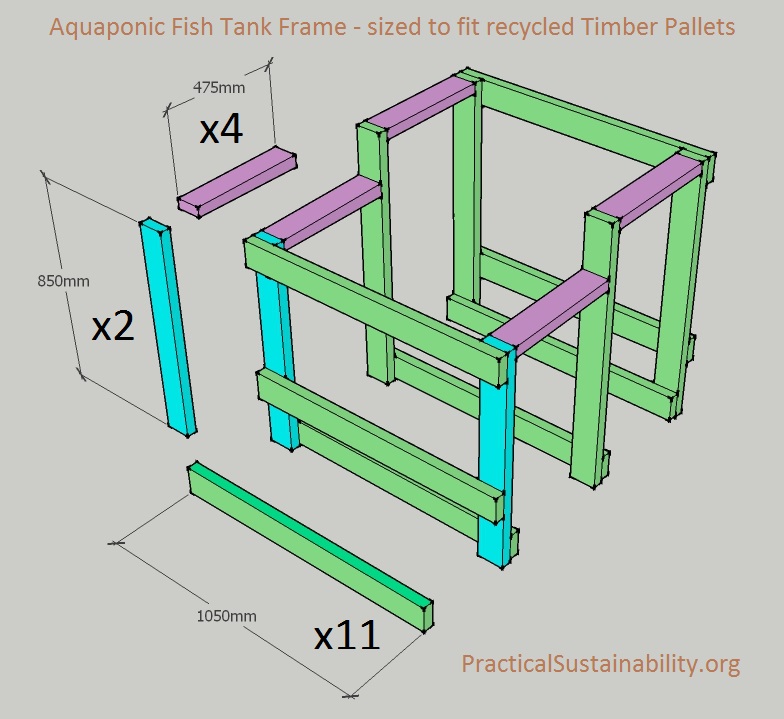
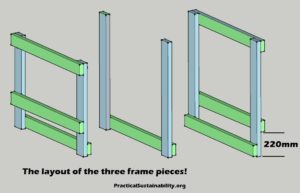
Plans for the recycled pallet aquaponic fish tank frame
Ad to help pay for servers:
Building the frame:
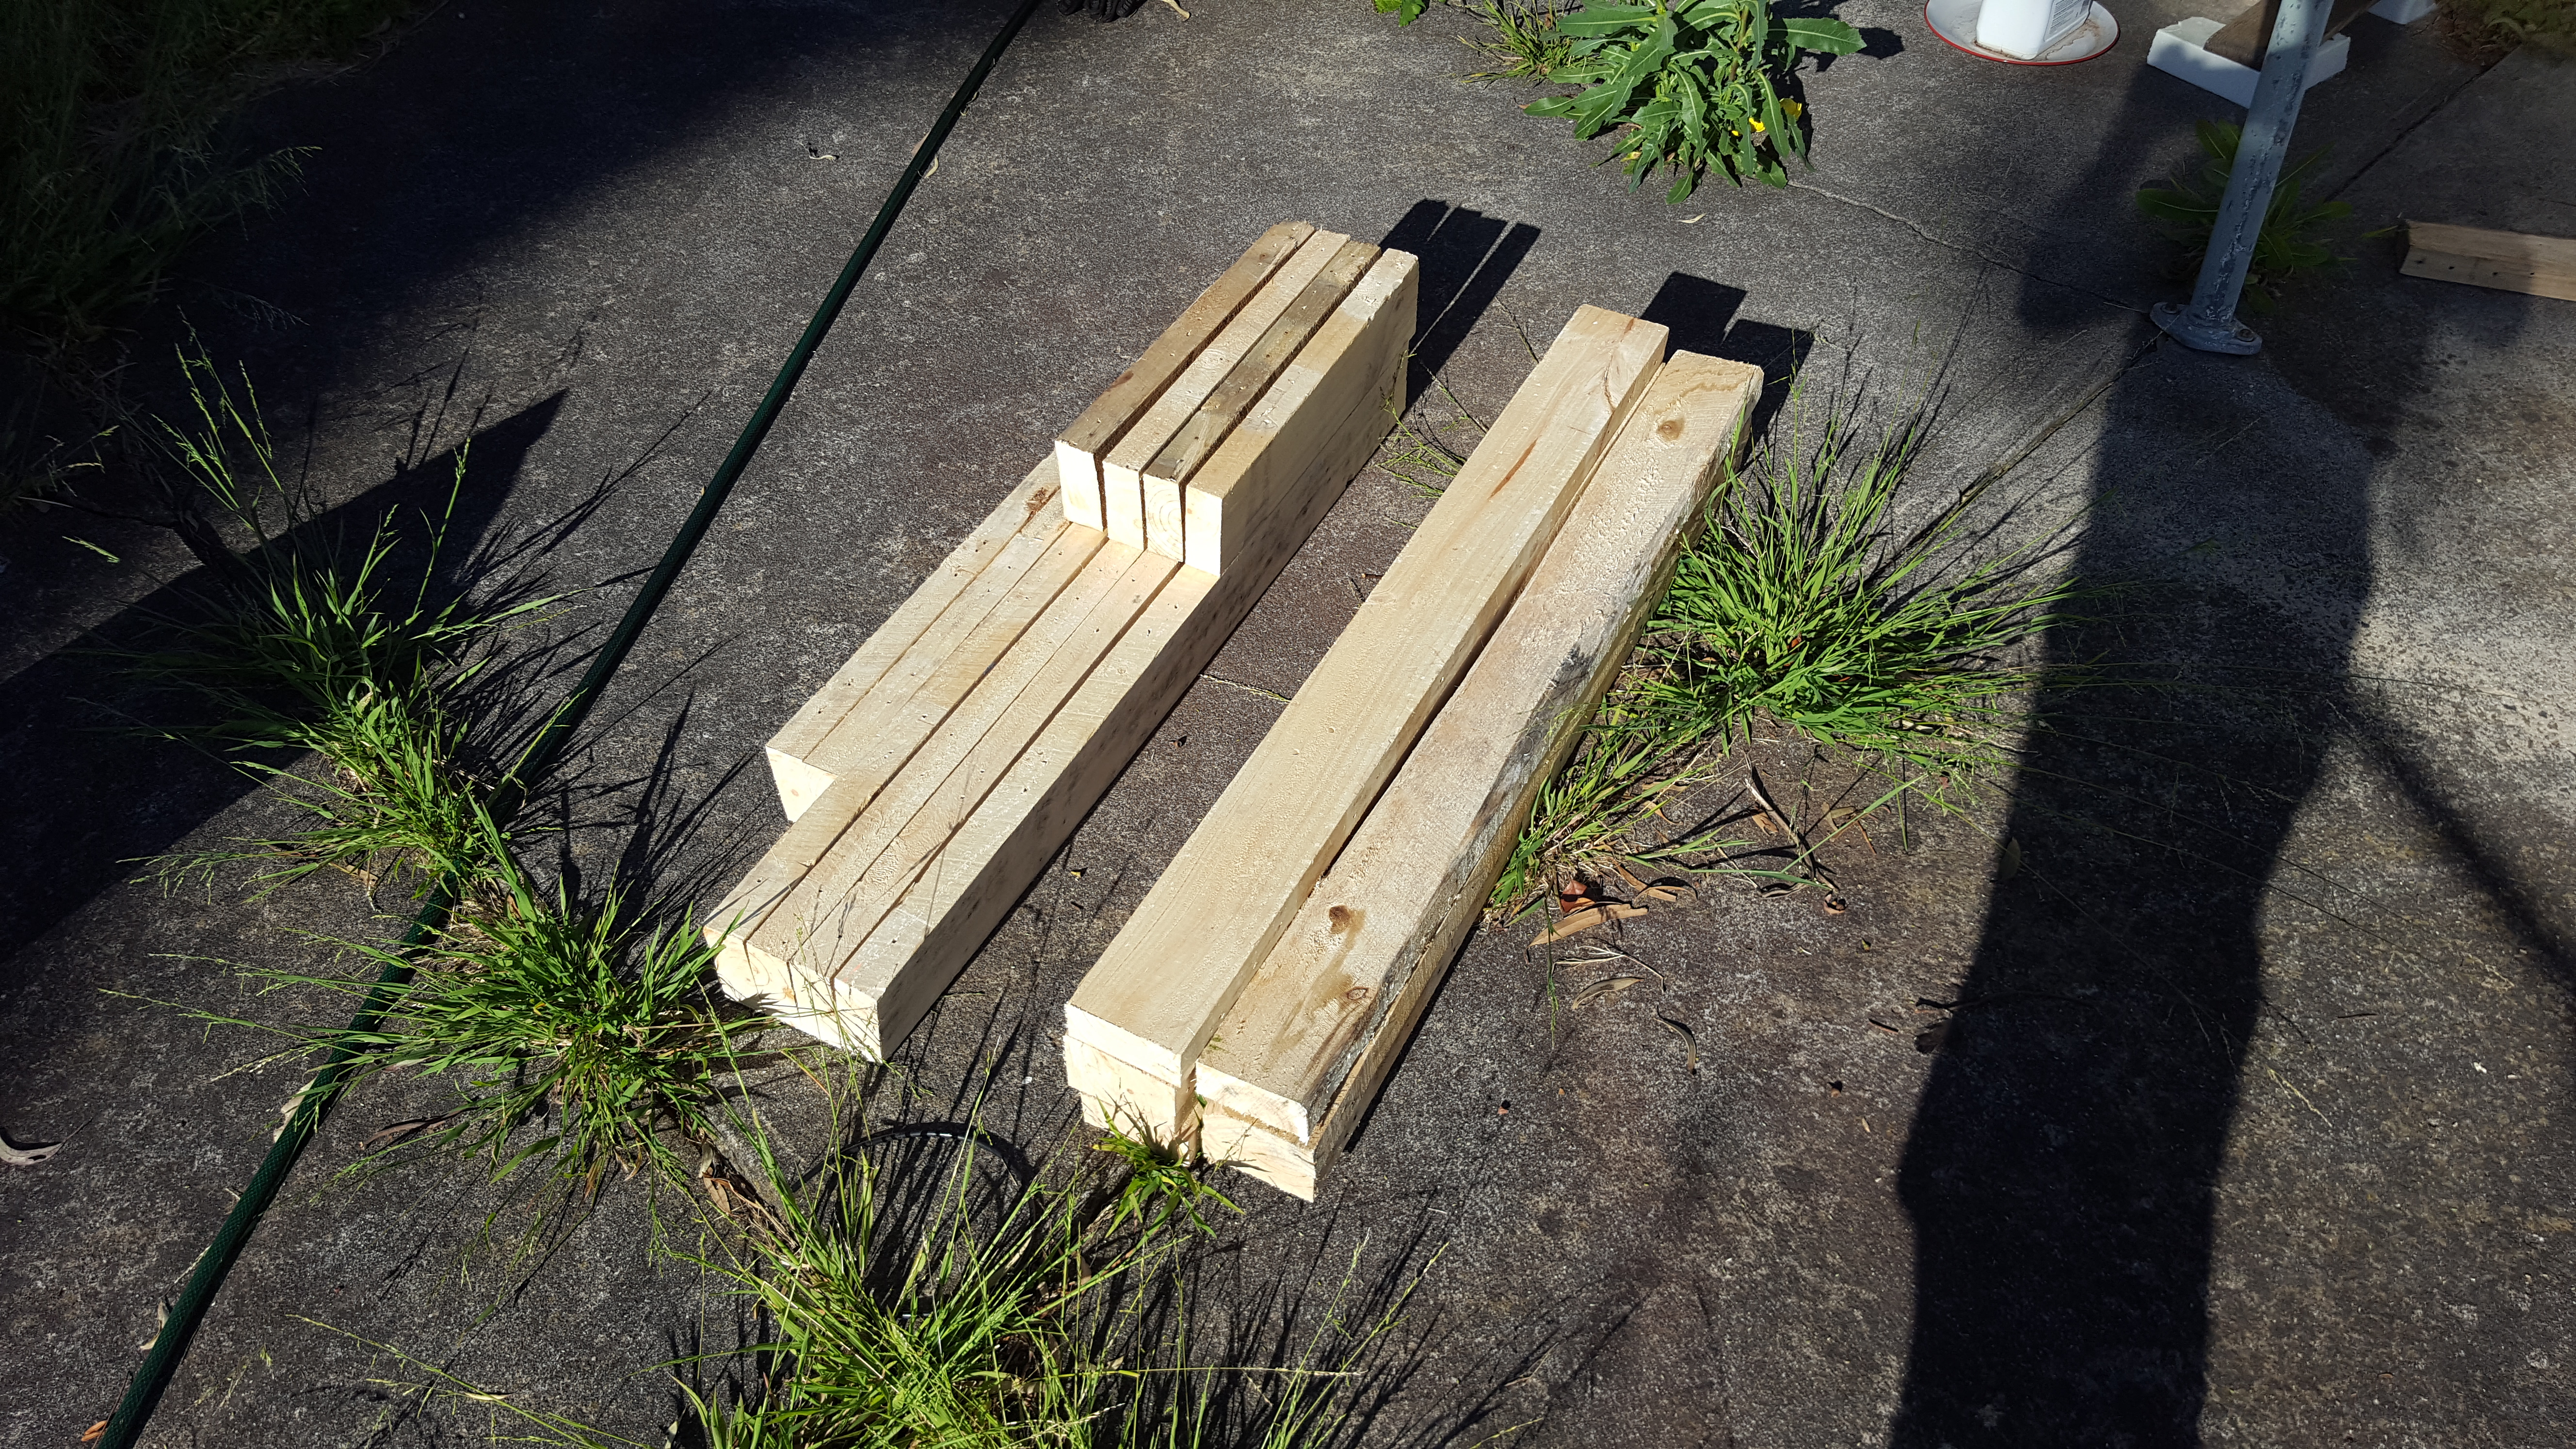
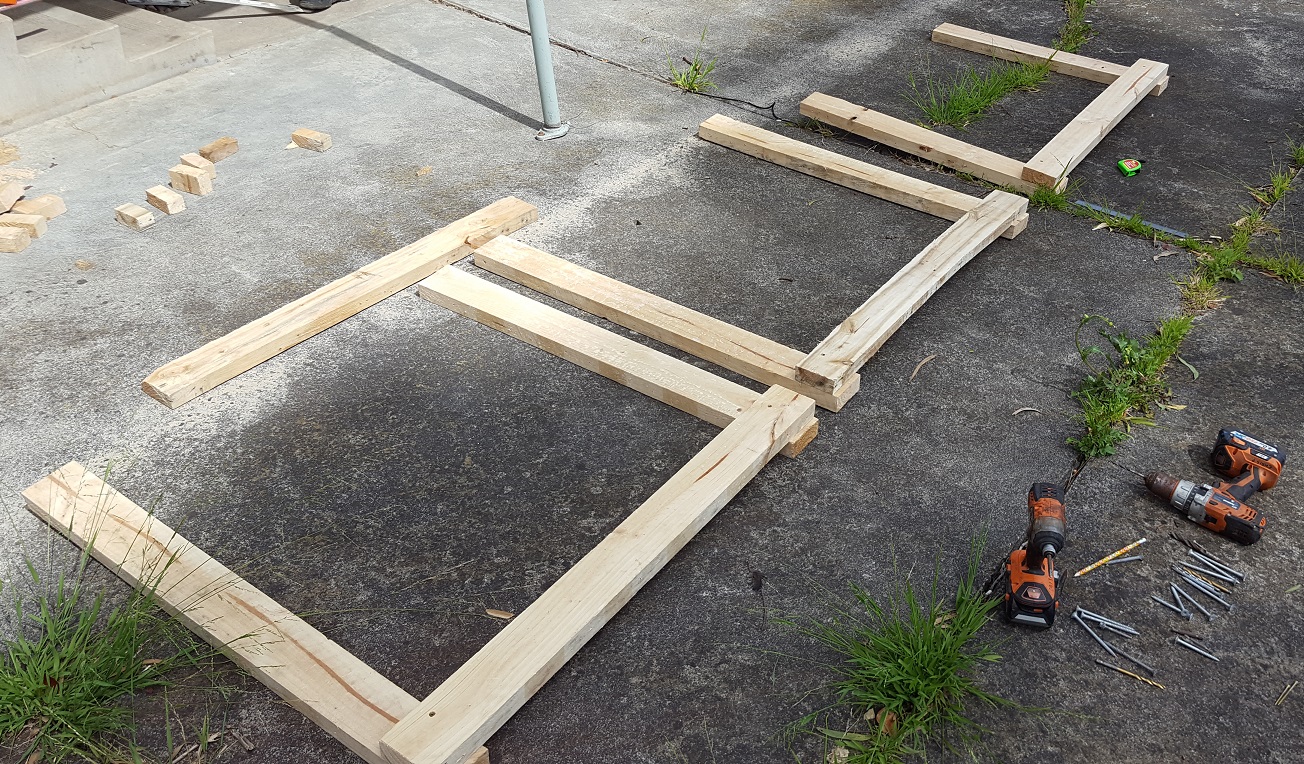
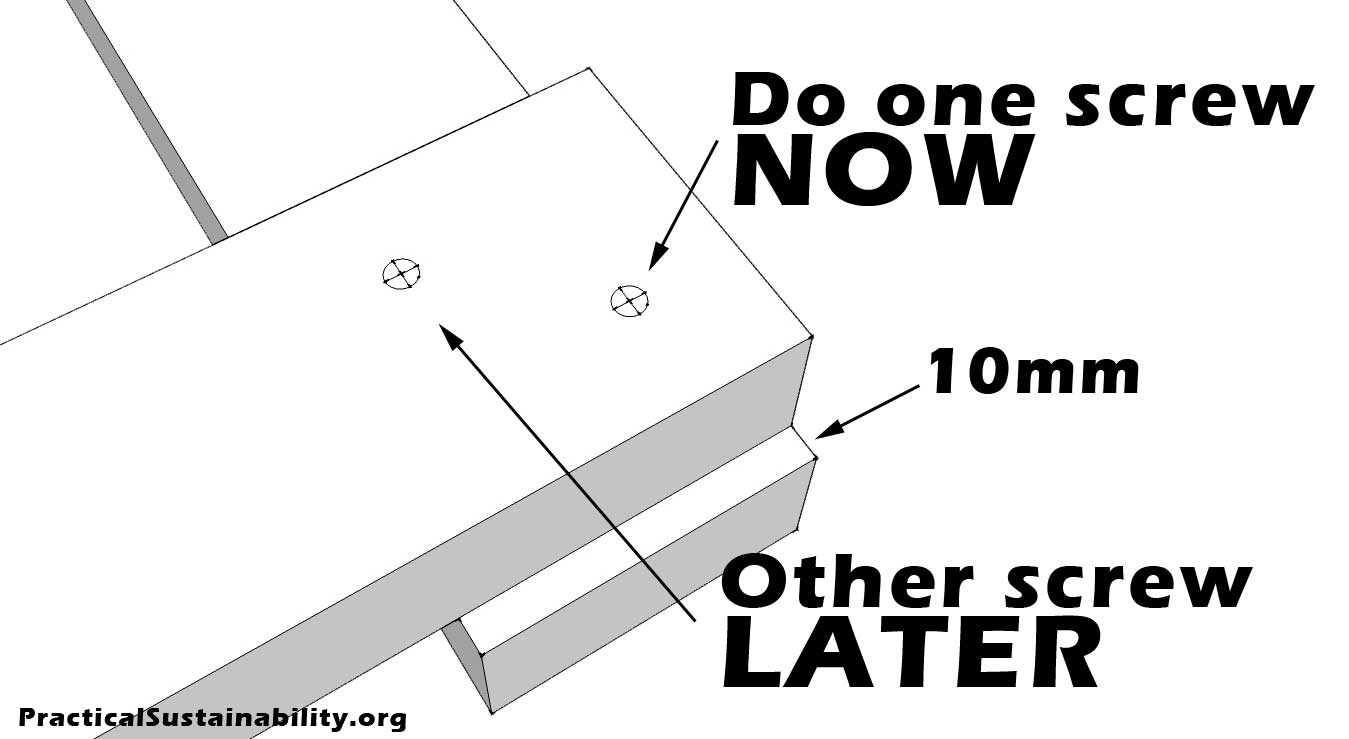
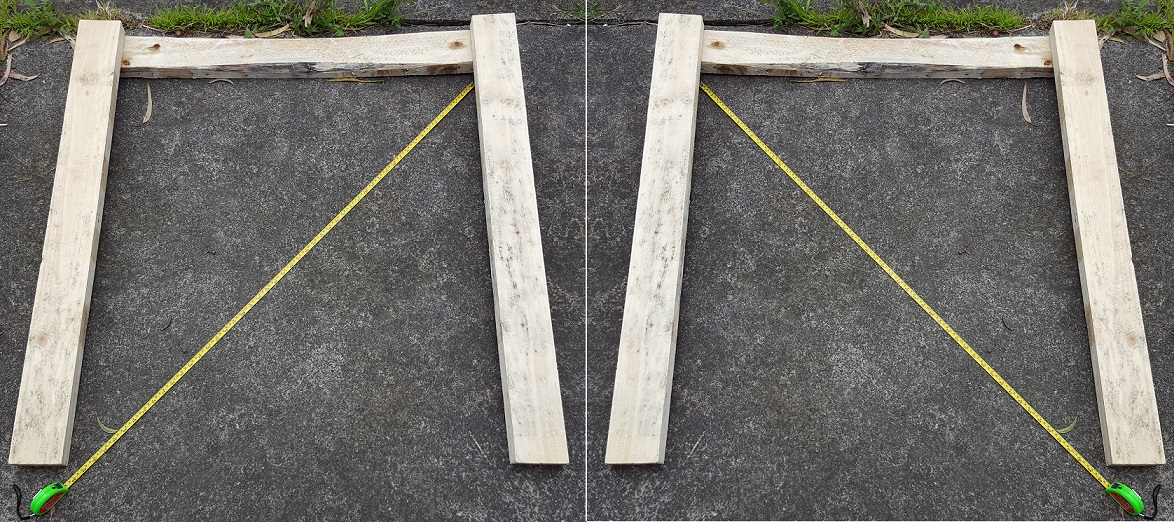
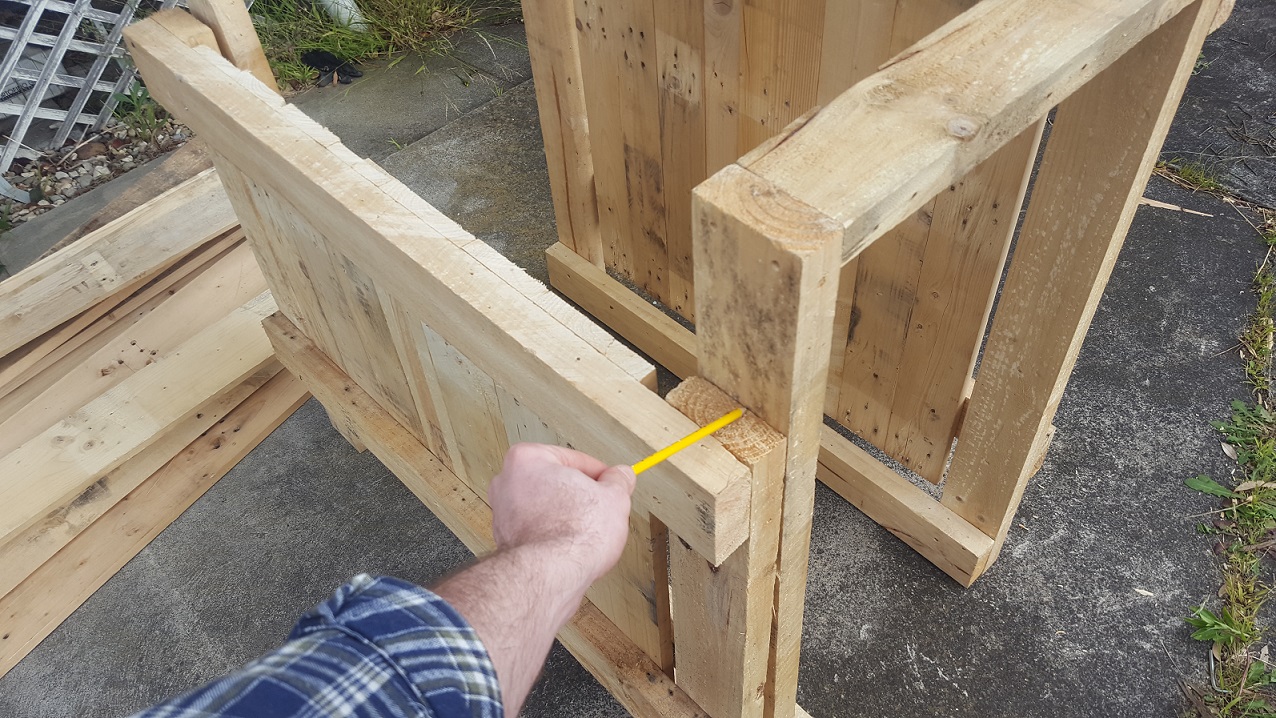
Cut your frame pieces to length using the Frame plan above.Lay out your 6 tank legs and cross pieces as shown, then get them roughly square.Line up your leg joints as pictured. Get it roughly square, measure the 10mm – then put in ONE screw. Do this on all 6 leg joints. Having only one screw lets you fine tune the angle of the joint before locking it down later.Get your frame pieces square by measuring from corner to corner in both directions (pictured). Also measure between the two legs to make sure they are parallel. When your two diagonal measurements are equal, your frame is square! Jiggle them around until you’re satisfied they are square, then put the second screw into each leg joint – which will lock them into place.Attach the rest of the cross pieces as pictured. Use two screws for every join. Double check everything is parallel and square as you go.
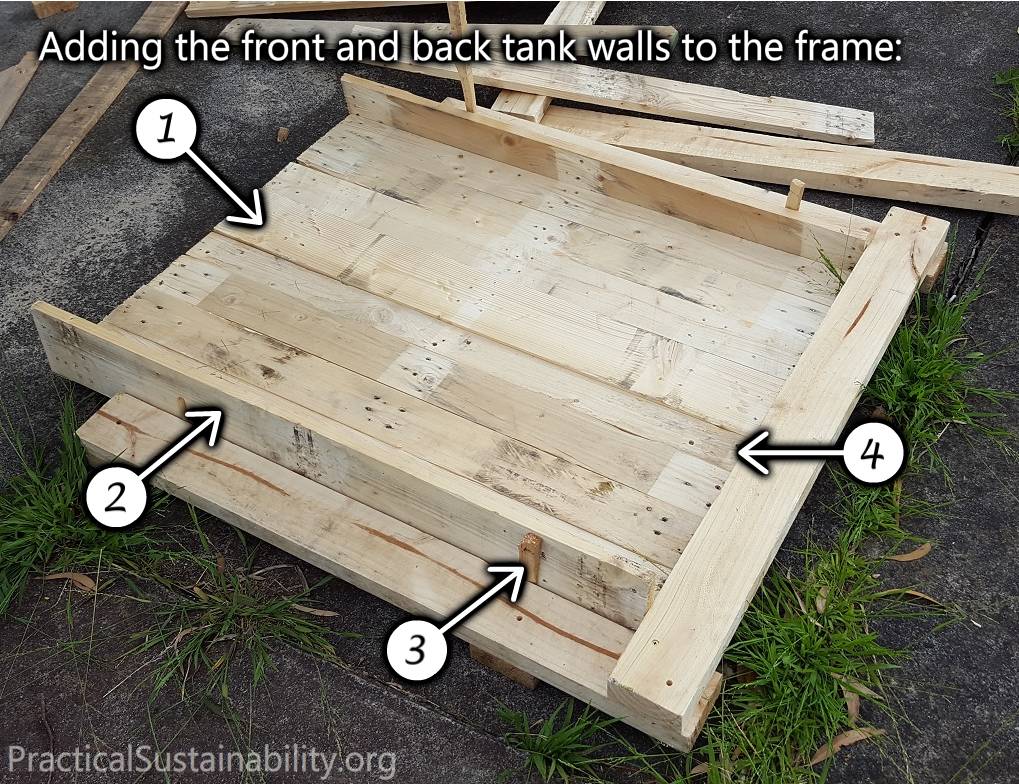
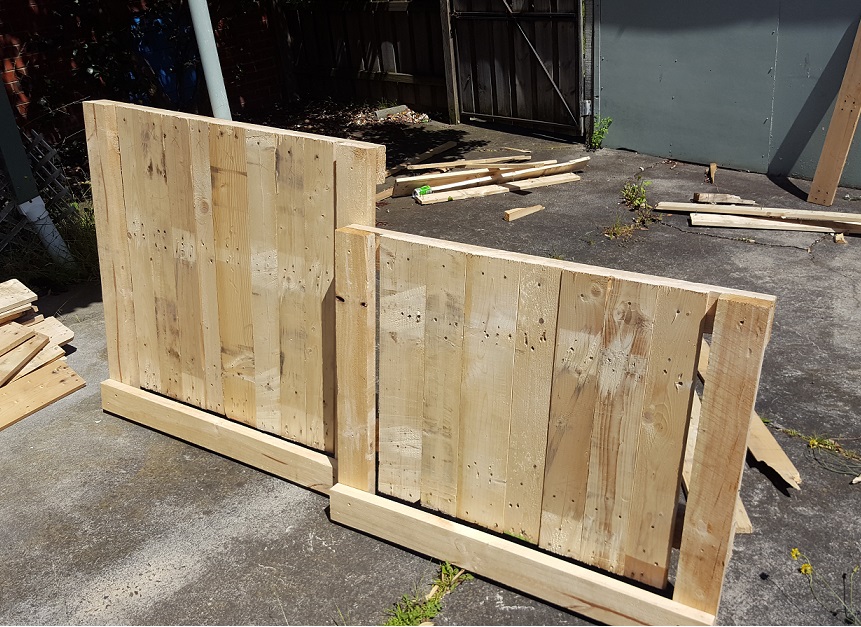
Whack some timber on the front and back pieces of the frame!
Lay your slats out as shown, these will be the wall of the tank. You won’t see the inside of the tank when it’s finished, so put the nicest looking side of the timber facing down. You may have to cut one long-ways to get a tight fit, but don’t bother cutting these to length, just leave them at their full size and we’ll trim the ends off later.
These boards are loose, and are just spacers to leave room for the other tank walls to connect later. Make sure these spacers are the same thickness as the timber you plan to use to make the left and right walls of the tank.
I used some scrap timber as wedges to help push the spacers inwards and give the tank wall a squeeze to avoid any gaps.
I lined the end of the slats up with the top of the frame timber, where the arrow is pointing. But you could leave your slats running longer to reach closer to the ground if you want – just don’t make them any shorter than I did!
Do this process for the front and back pieces. For the front piece there will be quite a lot of overhang that will be trimmed off. If you have any damaged timber, you can use it here where the damaged bits will get trimmed off soon. (See where I placed damaged bits in the next picture, and what happens in the picture after)
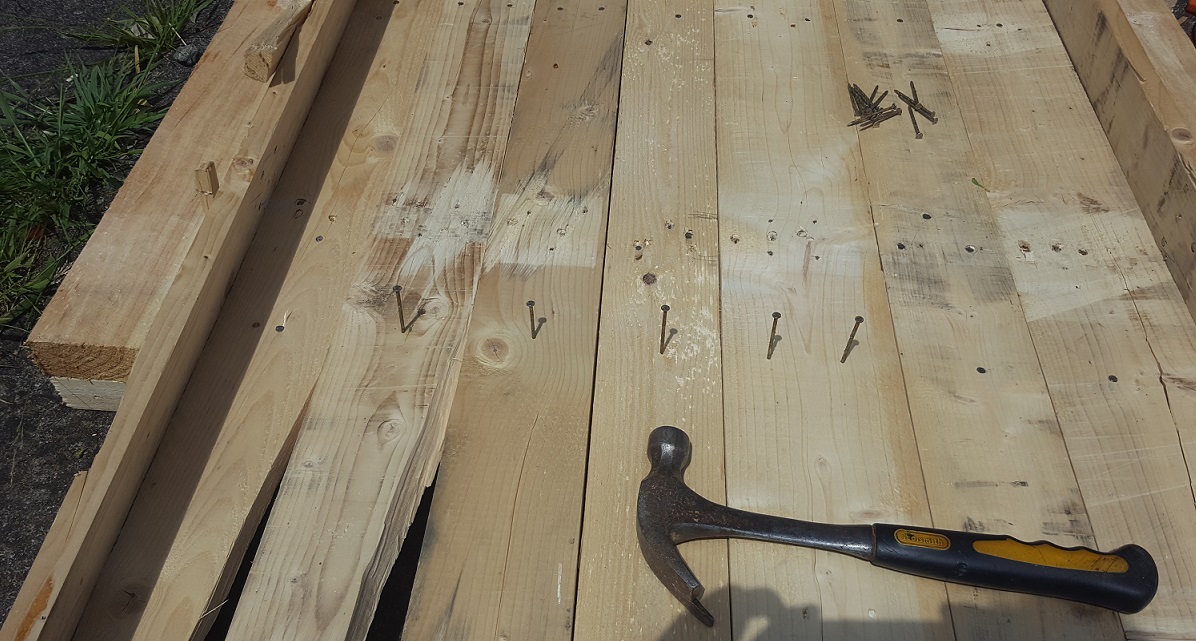
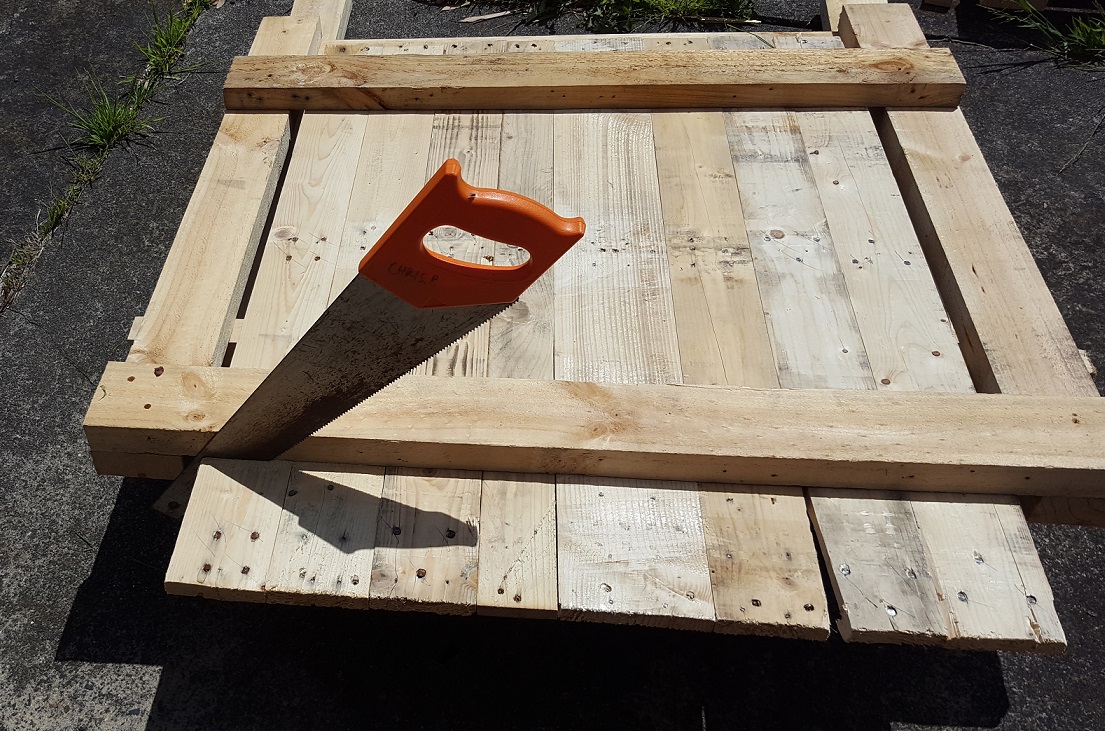
Nail the slats to the frame. I used recycled nails from the pallets I disassembled.Flip it over, then trim the slats off where they overhang the frame.Front and back pieces done!
Ad to help pay for servers:
Put it all together:
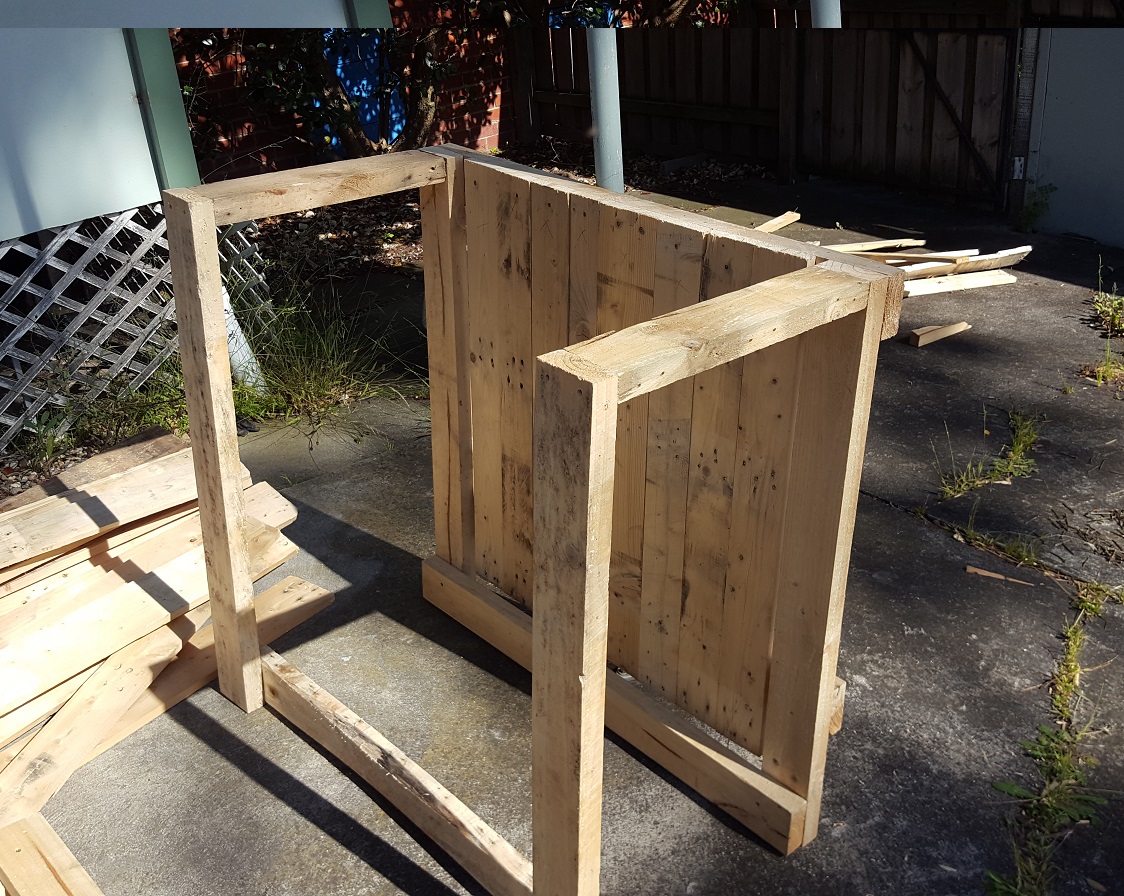
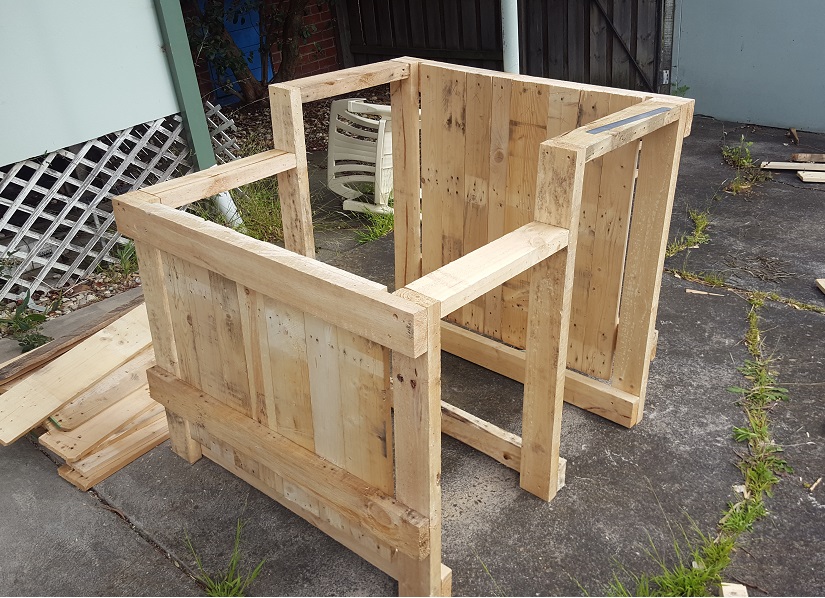
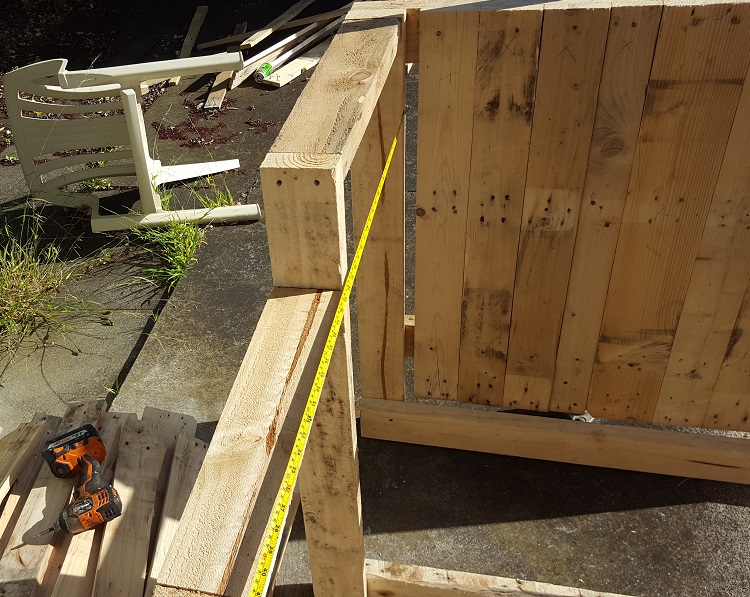
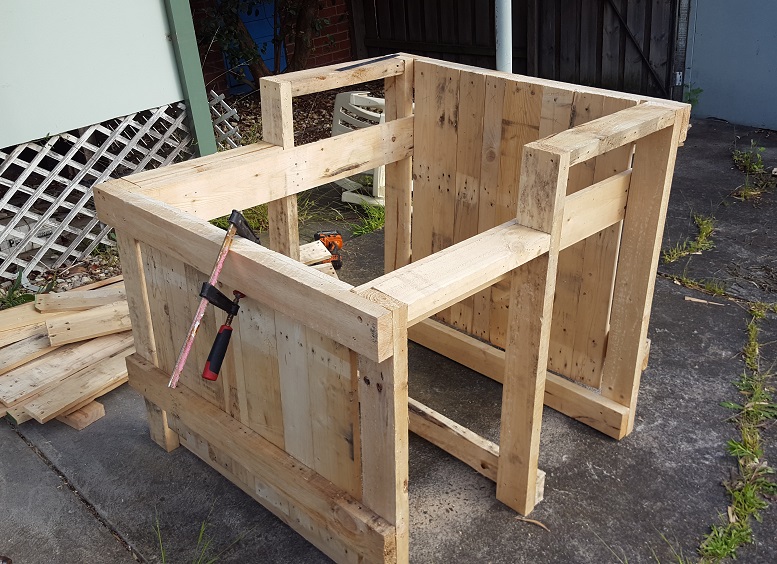
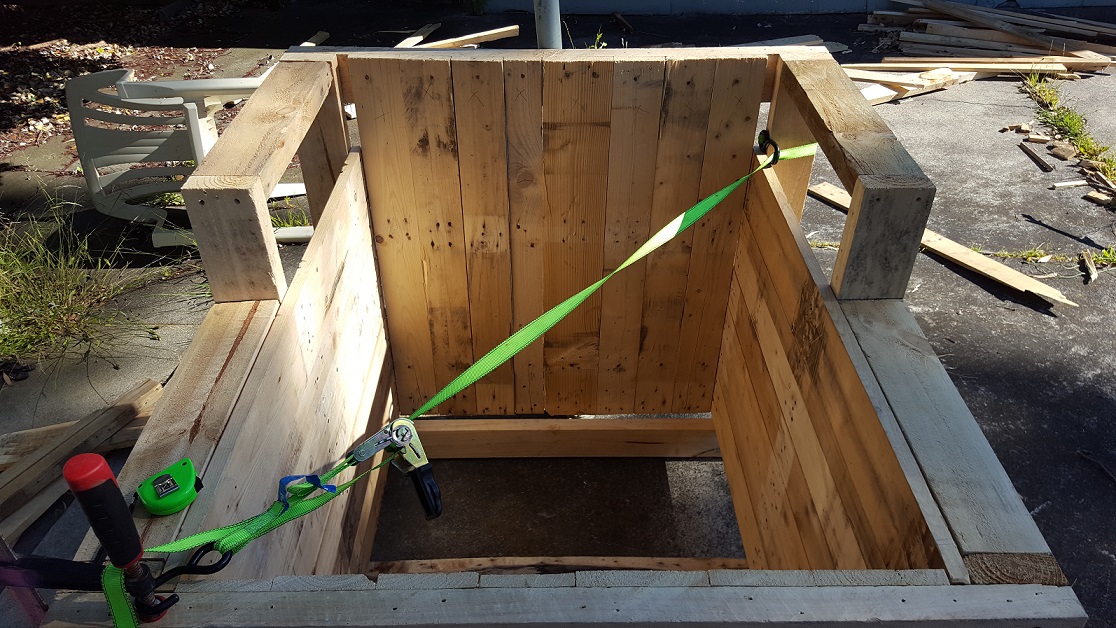
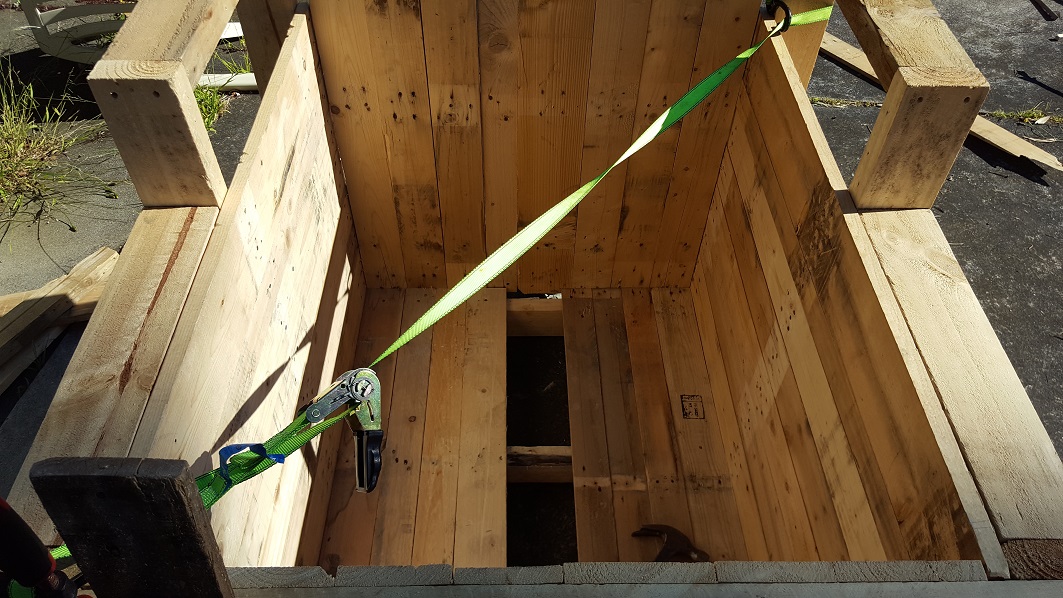
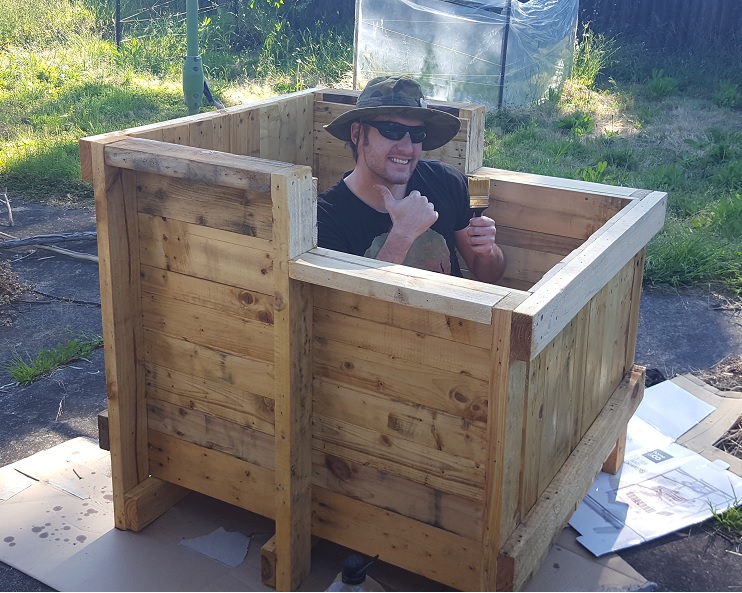
Screw in two short pieces connecting the back and middle of the frame. You may need to use longer screws for some of this – but don’t worry too much, these pieces are not load bearing once the tank is completed.Measure or trace a line onto your middle piece as pictured, at the exact height of your front piece.Screw in your other two short pieces! The frame will still be quite wobbly, but don’t worry.Measure for your tank side slats, as pictured. It should equal your two short horizontal pieces plus the thickness of your three leg pieces. Make 100% sure your measurement is long enough to totally cover all three legs.Cut two slats, put them in place as shown. Put ONE screw through each slat into the front piece, and another into the back piece. Check everything is square, and all the legs are parallel. Then put ONE screw through each slat into the middle piece of the frame.Do the same again for the bottom slat of the tank sides. Double check everything is square and parallel, measure diagonally all over the place! When you are satisfied, put in a few more screws into your 4 new slats. This will lock the frame into position.Fill in the rest of the side slats! You may have to cut one lengthwise for a good fit. I used mostly recycled nails for this, but also a few screws on some slats, for added strength.Before you put in the floor of the tank, measure diagonally across the inside of your new tank walls. If it isn’t square, one diagonal will be longer than the other – you can see here how I used a ratchet strap to pull the frame inwards and shorten that diagonal measurement.Once it’s reasonably square, install the floor of the tank. Nail or screw them to the frame, and use more than one nail per frame join on a few boards – to help lock the frame into position. Check there are no splinters or pointy bits inside your tank – sand or hammer them.Finish off cladding the frame, give it a quick sand with some rough sanding paper to clean up any rough edges -then give it some oil! Pay special attention to the cut ends of your timber, soak in as much oil as they can take – especially the feet of the tank. You could also use paint, but make sure it’s made for outdoor timber usage! I used Linseed oil.
Ad to help pay for servers:
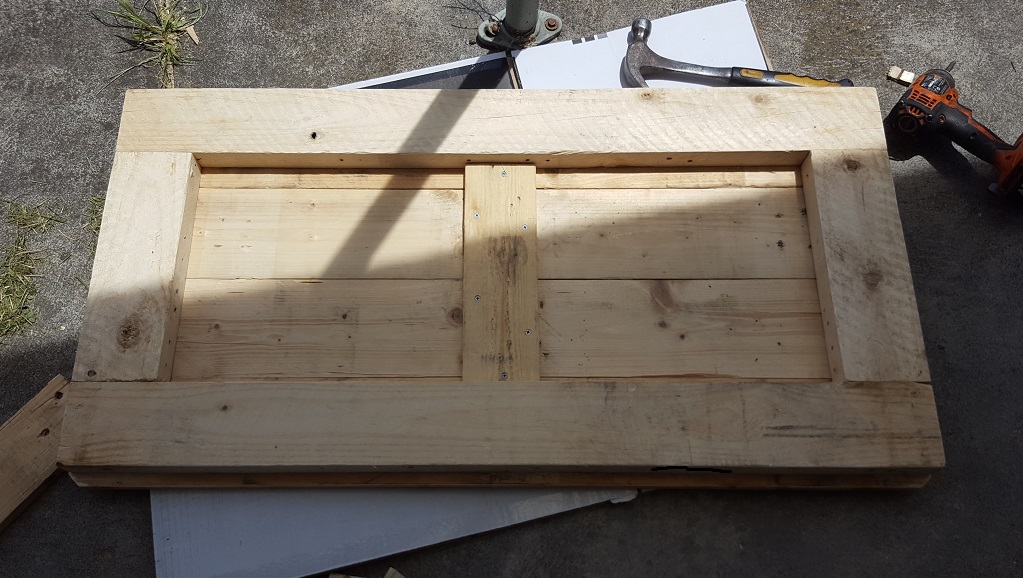
Make the Lid!
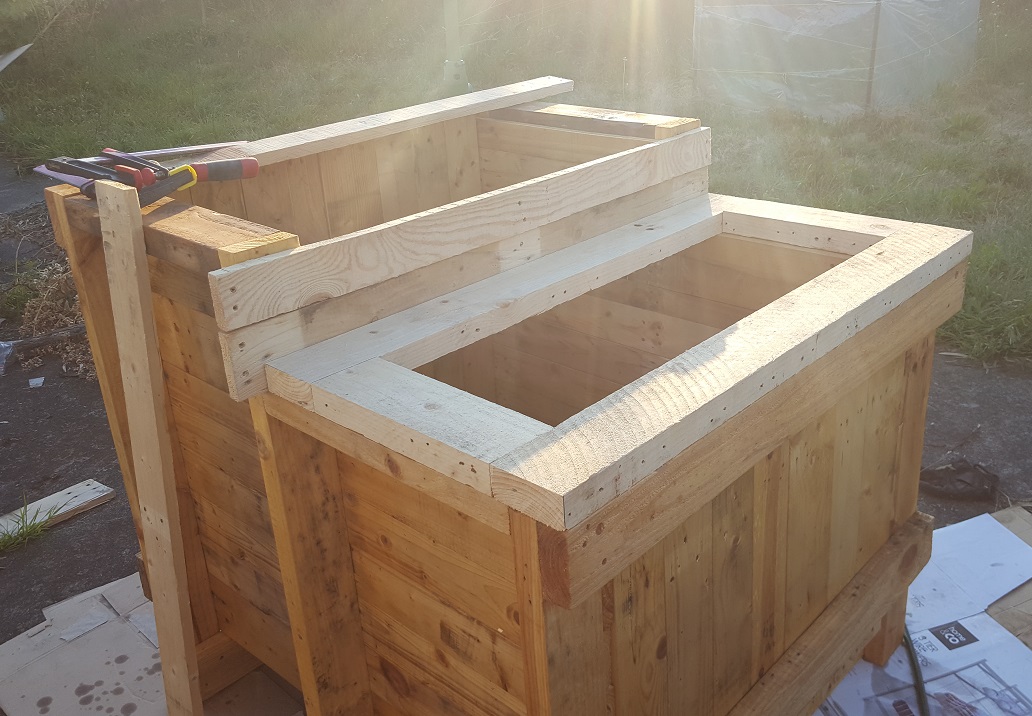
Measure the distance between the top of the two front legs, and also between the two back legs. If they don’t match, figure out a length that’s halfway between the two. That will be the width of your lid frame. The two pieces standing on their edge are just spacers.Cut two short pieces to finish your lid frame. Screw them together with two screws per joint. If your screws aren’t long enough, drill a hole (that is wider than your screw heads) halfway through your timber – then put a screw in that hole.Clad the new lid frame with timber, and give the edges a quick sand. I used recycled nails but I recommend using screws for this – water can sit on the nail heads and cause ugly rust patches.(optional) Screw a small bracing piece under your lid. Connecting all the slats here will prevent any major warping over the years.
Ad to help pay for servers:
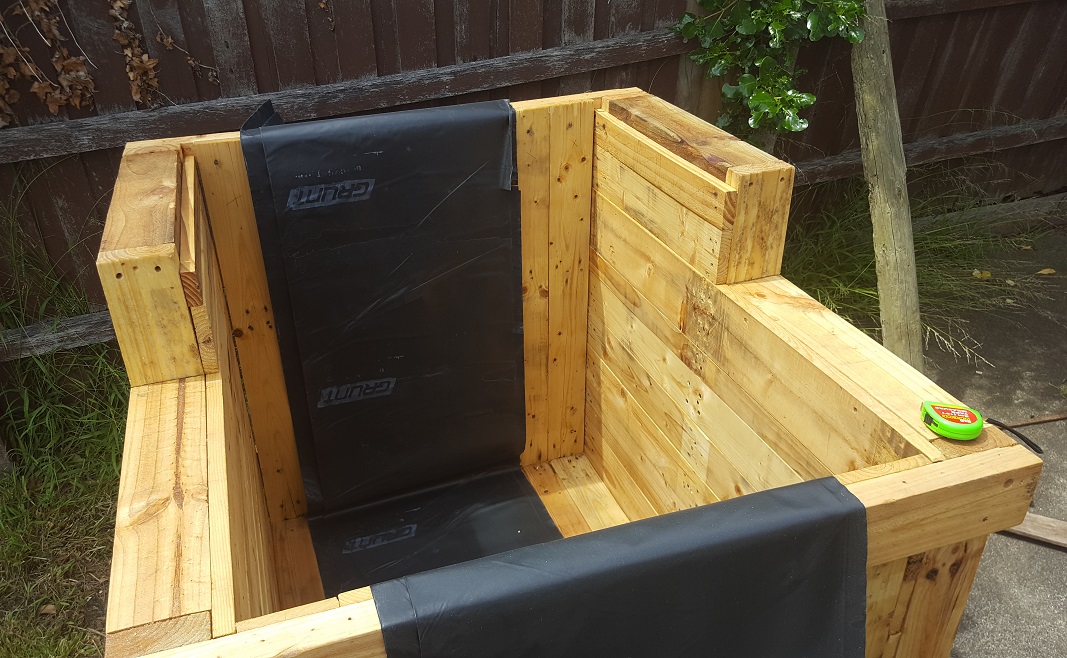
It’s time to line the tank with plastic! Put your lid pieces away for now.
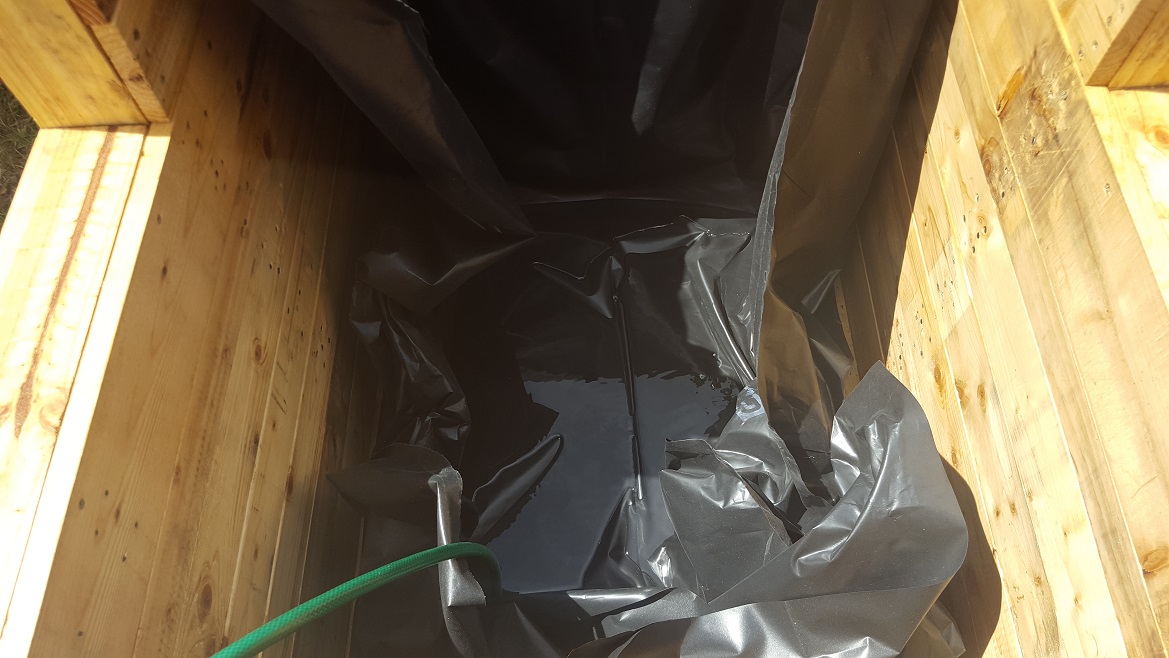
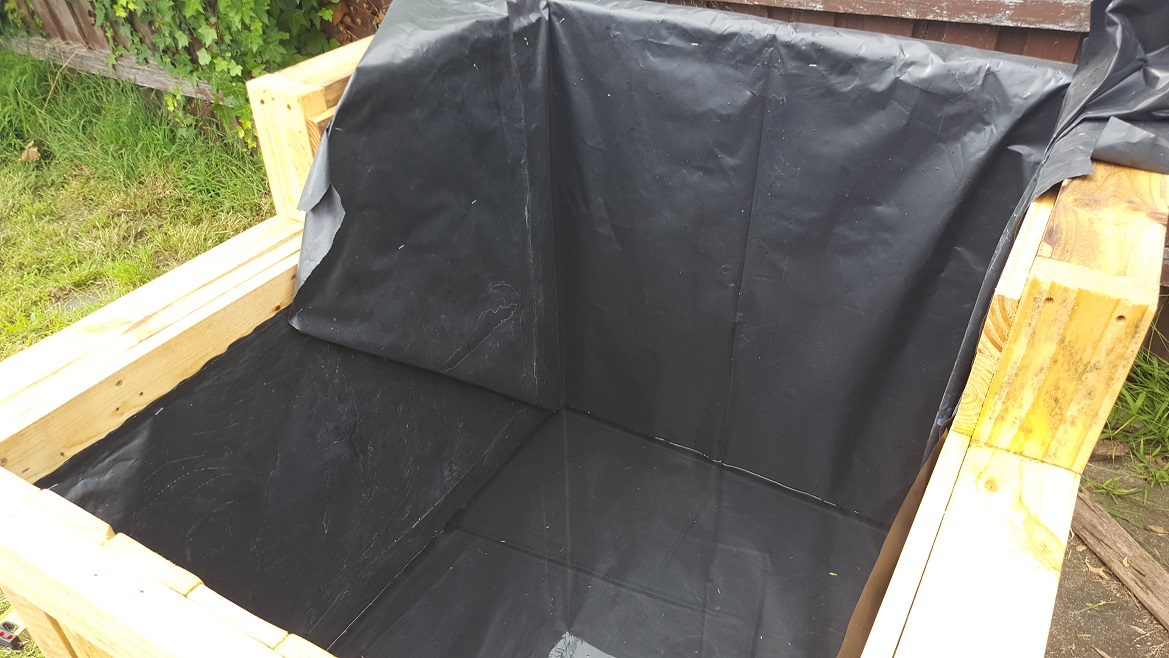
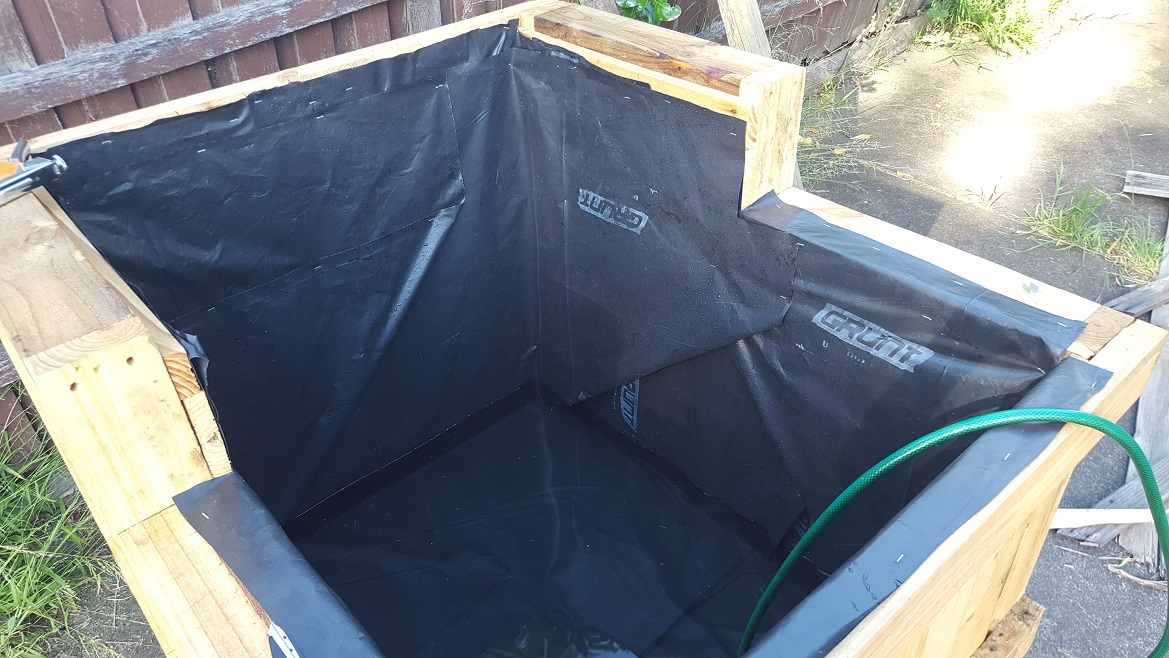
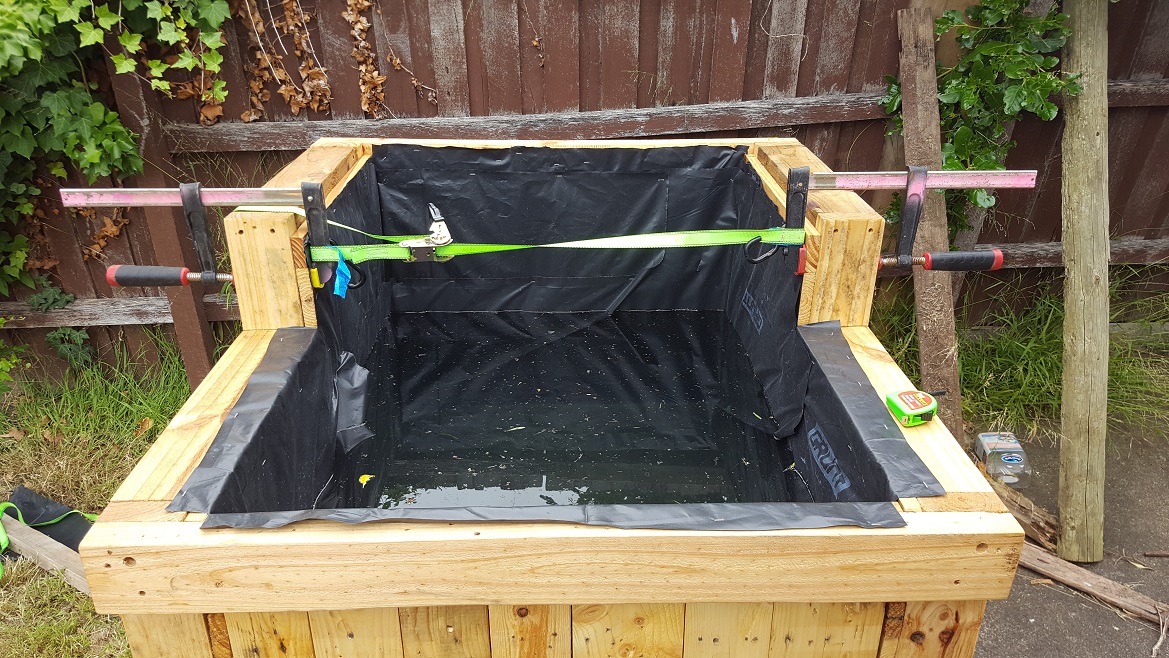
First, roughly level off your tank, or put it on a flat area.Here’s what I used as a liner.Roll out your plastic so that it reaches the back and front lip of the tank as shown. Get some scissors out and cut the rest of the roll off along the front lip.Spread out your plastic. You’ll see creases along it where it was folded. – line these up so they are parallel with the left and right walls of the tank. Put an inch or two of water in – to help spread it out. Also make sure your sheet is centered.Once your tank lining is square and centered (you can see a crease in mine straight down the center) put in a little more water. Get the bottom as flat as possible – you may have to climb in the tank to do this – go barefoot. Check the plastic reaches the corners – then staple the upper left and right edges . Then do the same for the upper back and front edges. You’ll be left with long triangle pieces sticking out from the corners. Fold them over neatly as shown, and staple them down (don’t staple below the water-line anywhere, obviously)If you used a thicker plastic than me, you may not need to do this. But it’s recommended you add a second layer of lining. Siphon any water out of the first layer and repeat the previous step. Shown in the picture is after the second layer has been applied.
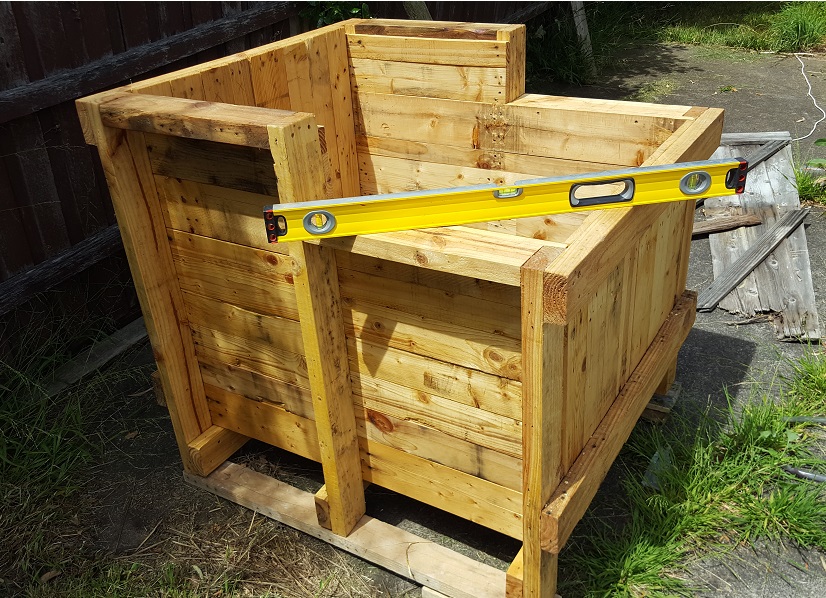
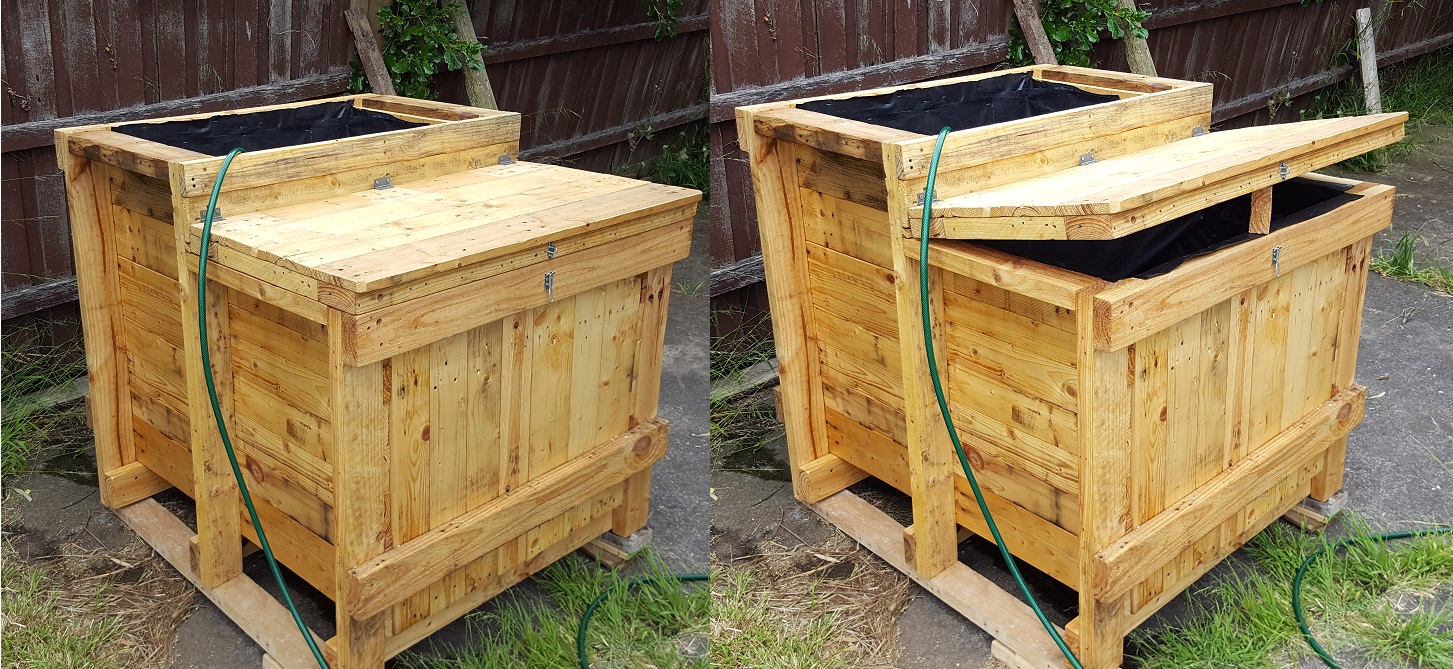
Lining complete! Time to install the lid and last bit of the frame:
Get ready to connect the left side of the frame to the right side! I used a strap to bring my sides in to the right distance – but if you have a spare set of hands nearby you can muscle it into position. Drain the water if you are having trouble squeezing the sides inwards, or fill the tank if you’re having trouble pushing them apart further.Screw on the last pieces of the frame behind the lid, then install hinges to attach the lid. Use at least two hinges that screw through the cladding and into the frame (left and right hinge pictured). The middle hinge is optional.Frame. Lid and Lining completed!
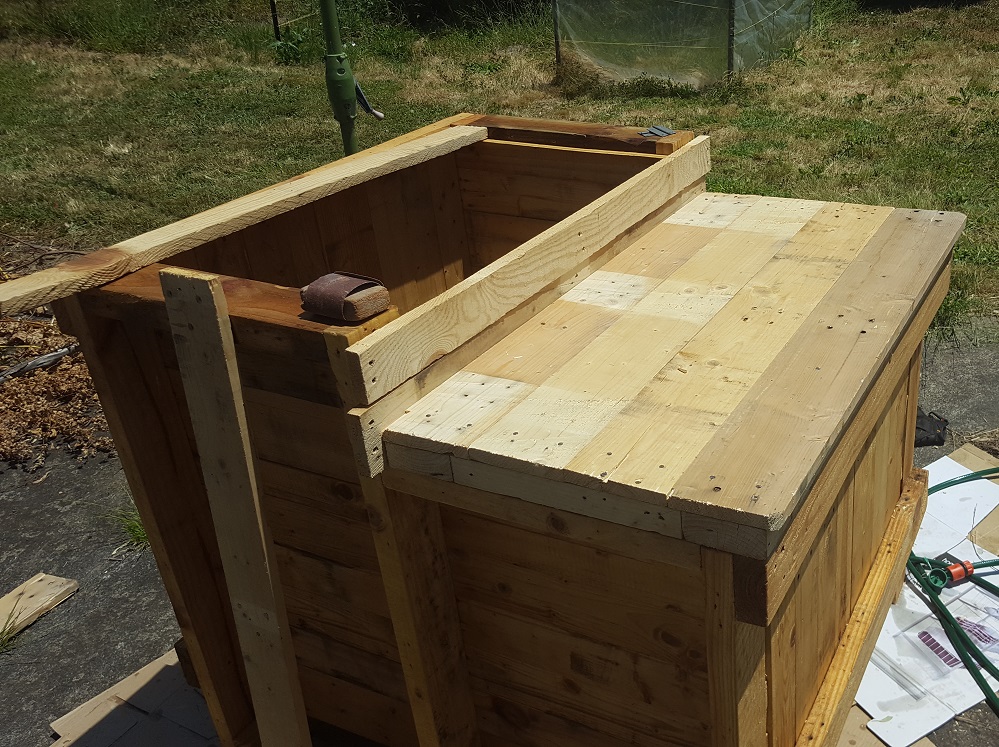
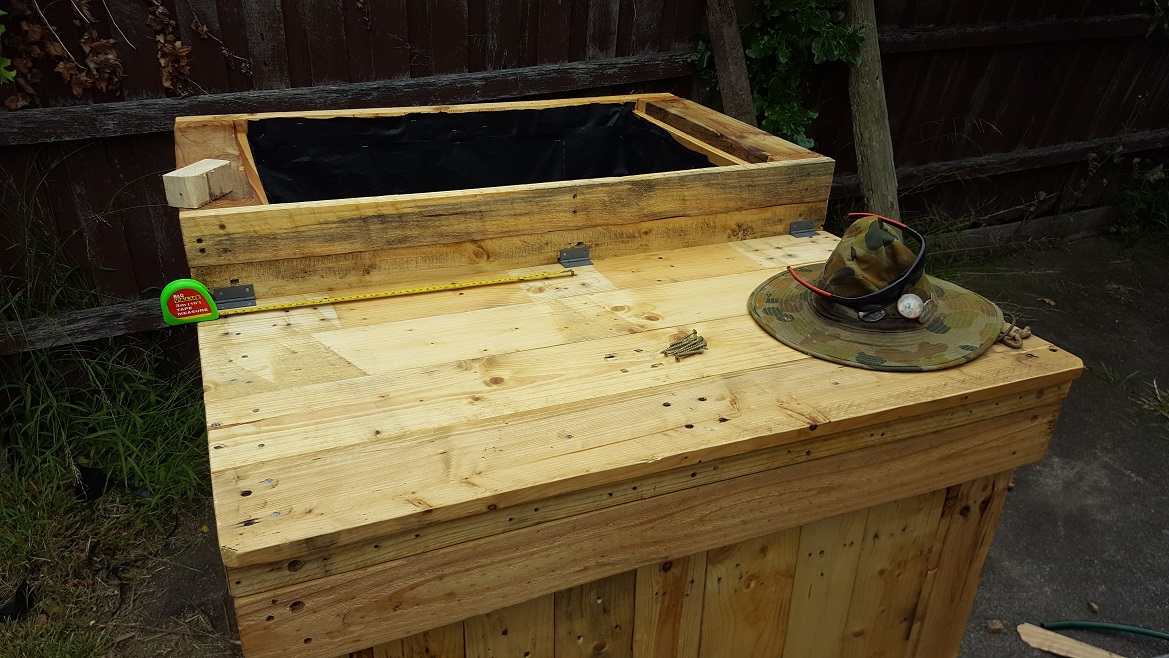
Building the back platform + installing swirl-filter & bio-filter:
NO TIME/BUDGET
I’ve built the back platform and cut two bucket holes, but haven’t the time/money to do the plumbing right now. I gotta go make sure my bills get paid!
The plumbing will only cost a few dollars, but it will take several hours for me to find the best configuration that will make it possible to replace/clean both filters without reinstalling any plumbing.
Hopefully I’ll have time or money soon – follow us on facebook to help out, or get project updates! I’ll complete the next part of the project as soon as possible. – Chris. 14/1/2017
Sure am! I’ve got a few more articles to publish first from other projects – but until that’s done, check out the Swirl Filter and Bio filter articles on the home page, they cover the basics that aren’t in this tutorial yet!
Wow, incredible blog format! How long have you evber been blogging for?
you make running a blog look easy. The whole
look of your weeb site is great, let alone thhe content!
Thanks! I’ve been a programmer for many years, this is my first blog though. I can’t take much credit for the layout though, web dev is too easy these days with all the templates and open source communities around


are you gonna finish or what
Sure am! I’ve got a few more articles to publish first from other projects – but until that’s done, check out the Swirl Filter and Bio filter articles on the home page, they cover the basics that aren’t in this tutorial yet!
Wow, incredible blog format! How long have you evber been blogging for?
you make running a blog look easy. The whole
look of your weeb site is great, let alone thhe content!
Thanks! I’ve been a programmer for many years, this is my first blog though. I can’t take much credit for the layout though, web dev is too easy these days with all the templates and open source communities around