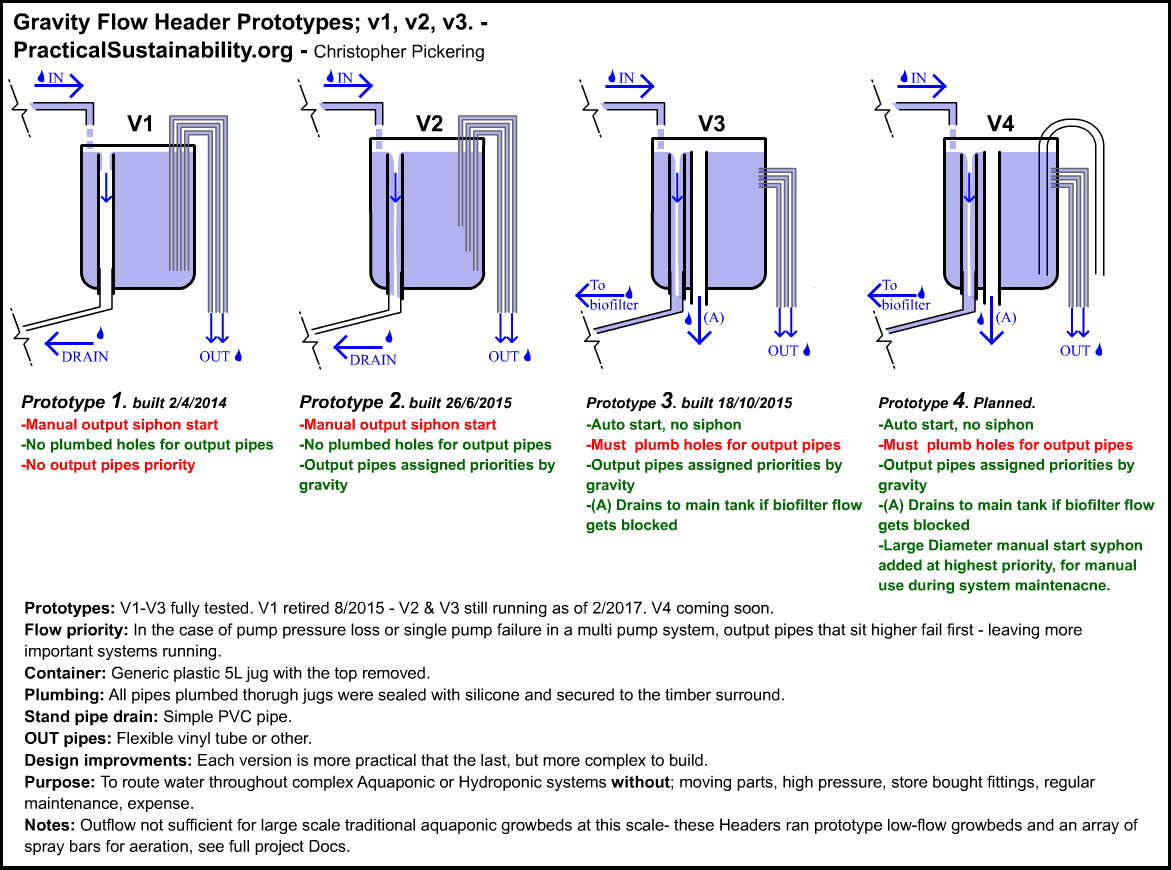
This article covers the creation of the 3rd prototype “Gravity Header Manifold” – designed to route water at low pressures – for Aquaponics or Hydroponics. The many outflow pipes led to spray bars for aeration, grow beds, glass fish tanks, and bio filters. This was the most recent design built, and it is running fine after more than two years, with zero maintenance and zero blockages.
Unlike the previous versions of the header, this design automatically starts all outflows instead of relying on permanent siphons – so if there is a short power outage or interruption, the system will restart itself. This Tutorial can be used to build a V3 or V4 Gravity Flow Header Manifold Show Below.
This is a pretty complex project if you’re a beginner crafts-person. The manual start, permanent siphon version was a LOT easier to build, with less plumbing and pipe management. Click here for prototype V2 Tutorial.
For more information about the Gravity Header Manifold projects, how they were used, and how they were connected, see: ////ARTICLE COMING SOON
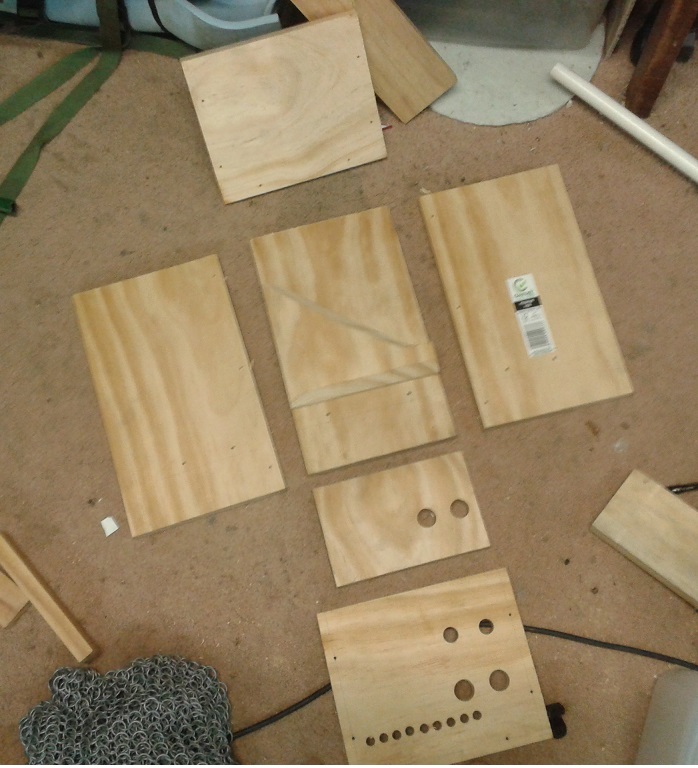
Preparing the jug and frame.

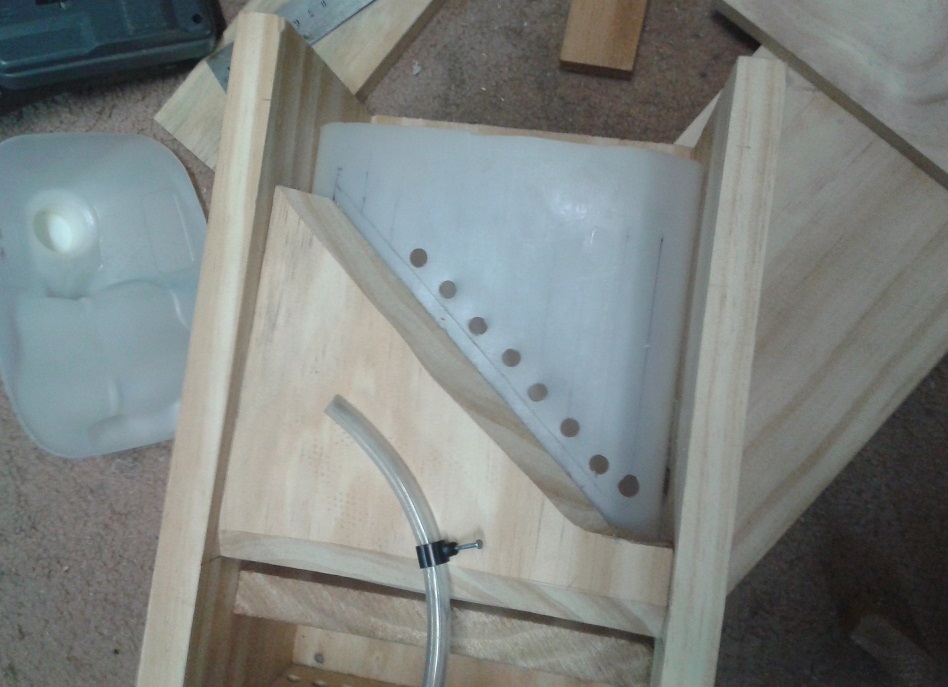
Notes on the stand pipe drains
- Make sure the top of the pipes will be at least 50mm/2in’ lower than the top of your jug/container.
- Make one slightly taller than the other – the lower one will be the primary drain, the higher one will be the secondary drain in case the primary one gets blocked. (I had the primary drain leading to a sealed bio-filter. Click Here for the Biofilter Prototype #2 Tutorial.)
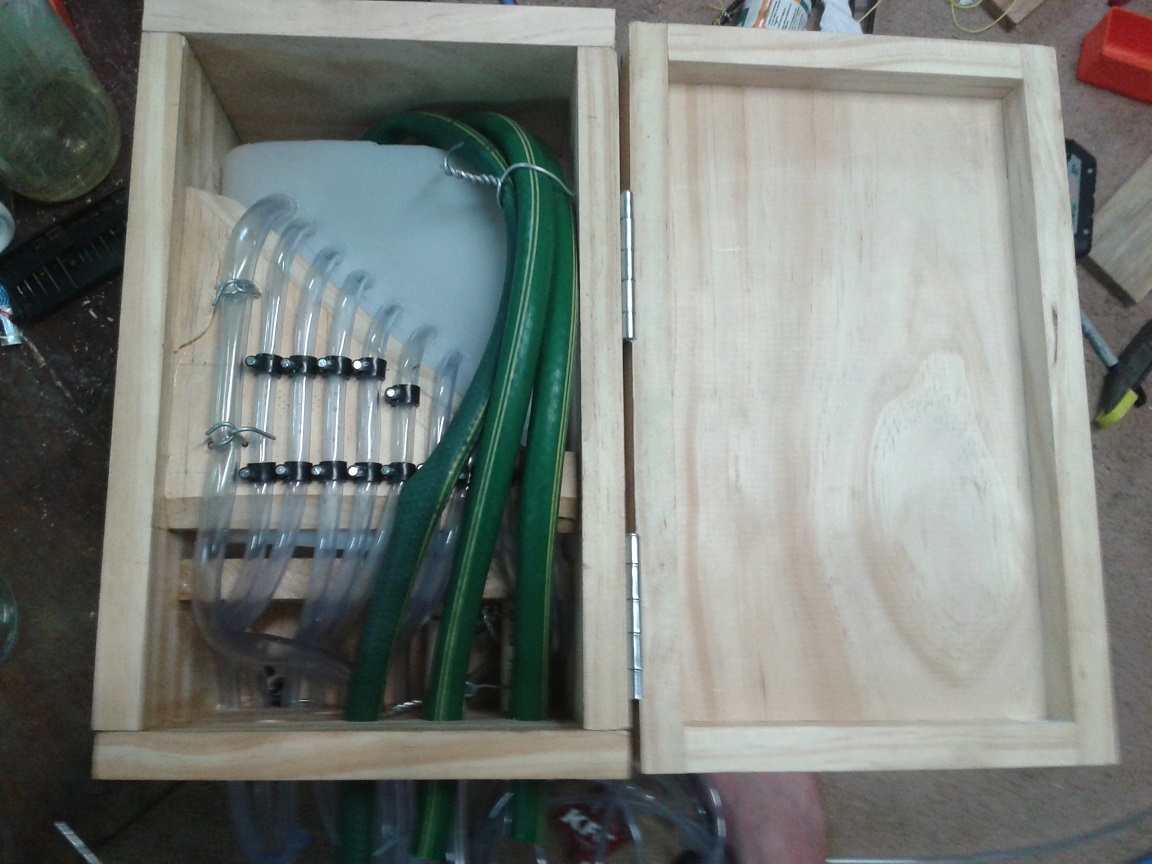
- Make sure that they are the right diameter so they can snugly fit inside or outside the pipes/hoses you plan to connect to them. The ones pictured almost perfectly fit some spare garden hose I had lying around. I just pushed it up into the drain pipes – and they worked fine for years with no seal or plumbing, since the outflows creates suction anyway. Any small leak will become a Venturi – air will be drawn in instead of water pushed out due to the low pressure gravity design.
- Don’t put them too close to the edges of the box, it will make it harder to plumb them through your jug/container.
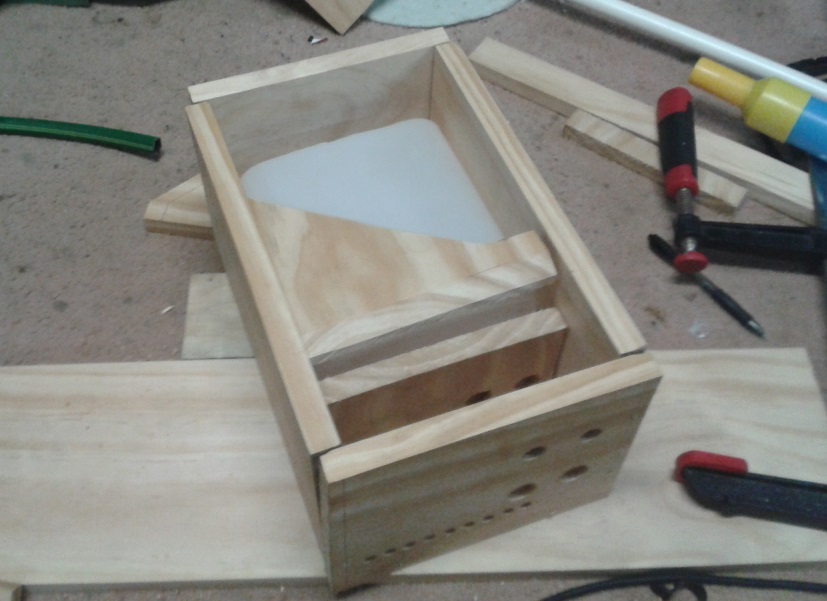
Screw the box together, and begin the pipe assembly.
Once you have your stand-pipe holes drilled, screw the box together, but leave off the top piece. Drill pilot holes before putting in your screws – to be sure the timber won’t split.

Notes on the holes in the base
Apart from the holes for the two PVC stand pipes, you can drill the holes wherever you want. I put mine close to the back of the box so they would hang closer to the wall when the header is installed later. Just make sure that you can tell the order of the pipes as they enter the jug, mine were highest priority on the rightmost hole, lowest priority to the left. You can drill these at any time in the construction process – except for the stand pipe holes.

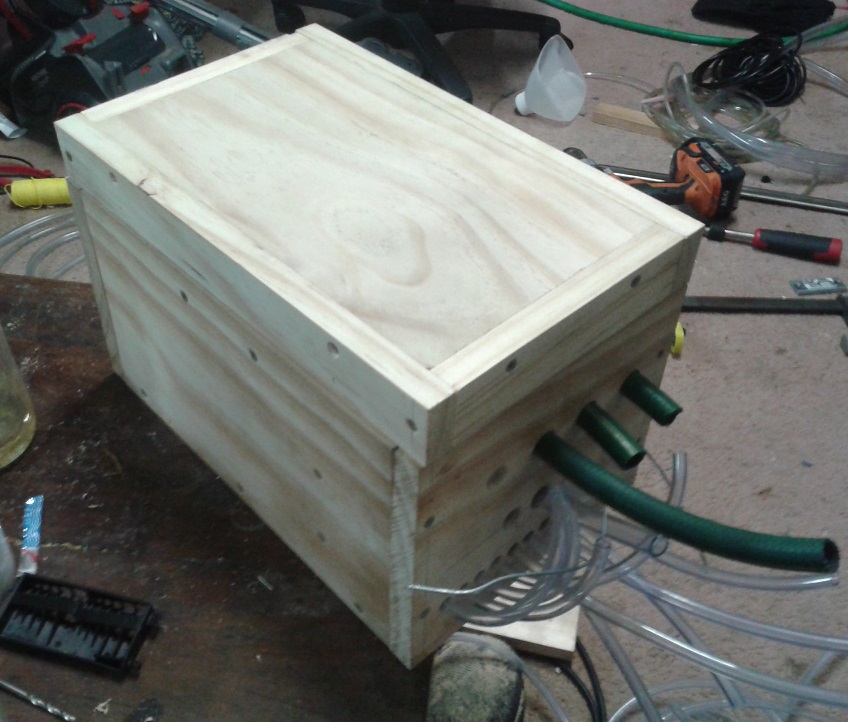
Done!!
Add latch or hasp to keep the door shut, and paint the exterior with some raw linseed oil or any other non-toxic sealer. I installed mine approx 1.7m / 5.5ft above my main Aquaponics tank and connected two pumps. The pressure from the 6mm output pipes was sufficient to run aeration spray bars and prototype grow-beds, as well as run a bio-filter from the primary drain pipe.
See the full article on the Gravity Header Manifold for information on how pipes are connected and capped. /// Coming soon
2 thoughts on “Gravity Header Manifold prototype #3 tutorial”